
Are you tired of food waste? Do you want to preserve meals for camping trips, emergency preparedness, or simply extend the shelf life of your favorite foods? Freeze drying at home might be the solution you're looking for. This comprehensive guide will walk you through the basics of freeze drying, the equipment you need, and how to get started like a pro. Let's dive in!

What is Freeze Drying?
Freeze drying, also known as lyophilization, is a dehydration process that removes moisture from food by freezing it and then subjecting it to a vacuum. This preserves the food's flavor, nutrients, and texture while extending its shelf life for years. Unlike traditional drying methods (e.g., sun-drying or oven-drying), freeze drying retains up to 98% of the original nutrients and requires no added preservatives.

Key Benefits of Freeze Drying at Home

-
Long-Term Storage
Freeze-dried foods can last 10–25 years if stored properly.
-
Lightweight & Space-Saving
Removing moisture reduces weight and bulk.
-
Convenience
Rehydrate with water for quick meals on the go.
-
Nutrient Retention
Vitamins, minerals, and antioxidants stay intact.
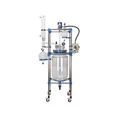
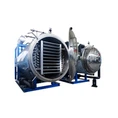
Key Features to Look For
• Vacuum Pump Quality: A robust pump ensures efficient moisture removal.
• Tray Material: Stainless steel is durable and easy to clean.
• Cycle Monitoring: Digital controls help track progress.
• Power Requirements: Check voltage and energy usage.

Step-by-Step Guide to Freeze Drying at Home
Let's break down the process into simple steps:
1. Prepare Your Food
• Wash & Chop: Remove dirt and cut food into uniform pieces (1–2 cm thick).
• Blanching: For vegetables, briefly boil to stop enzyme activity (optional but recommended).
• Pre-Freezing: Place food on trays and freeze at -18°C (-0.4°F) for 24 hours. This prevents ice crystals from damaging cell structures.
2. Load the Freeze Dryer
• Arrange Trays: Leave space between items for airflow.
• Close the Chamber: Ensure the seal is airtight to maintain vacuum pressure.
3. Start the Cycle
• Set Parameters: Most home models have pre-programmed cycles. For custom settings:
• Primary Drying: Raise temperature to -5°C (23°F) while maintaining vacuum.
• Secondary Drying: Increase temperature to 25–30°C (77–86°F) to remove residual moisture.
4. Monitor & Finish
• Cycle Time: Check the machine's display for estimated completion (typically 24–48 hours).
• Test Dryness: Break a piece-if it snaps, it's done. If it bends, extend the cycle.
5. Store Properly
• Cooling: Let food sit in the chamber for 1–2 hours post-cycle.
• Sealing: Use airtight containers or Mylar bags with oxygen absorbers. Store in a cool, dark place.
Common Mistakes to Avoid
1. Overloading Trays: Crowding reduces airflow and leads to uneven drying.
2. Skipping Pre-Freezing: Insufficient freezing causes "meltback" during drying.
3. Ignoring Humidity: High humidity during storage can rehydrate food. Use desiccant packs.
4. Neglecting Maintenance: Clean trays and vacuum filters regularly to prevent mold.
What Foods Can You Freeze Dry?
Almost anything! Popular choices include:
• Meats: Chicken, beef, fish.
• Fruits & Vegetables: Berries, spinach, corn.
• Meals: Stews, soups, lasagna.
• Snacks: Yogurt drops, trail mix.
• Herbs & Spices: Basil, garlic, ginger.

Advanced Tips for Success
• Batch Processing: Freeze dry in large batches to save energy.
• Rehydration Testing: Experiment with water ratios for different foods.
• Labeling: Include the date and contents on storage containers.
• Cost Savings: Freeze-dry seasonal produce when prices are low.
FAQs About Home Freeze Drying
Q: How much does a home freeze dryer cost?
A: Countertop models range from $2,000–$5,000. DIY kits can be cheaper but less reliable.
Q: How long does a freeze-drying cycle take?
A: Typically 24–48 hours, depending on the machine and food type.
Q: Can I freeze-dry liquids?
A: Yes! Freeze liquids into ice cubes before loading.
Q: Do I need a vacuum pump?
A: Yes. A vacuum pump removes moisture vapor during the process.

Conclusion
Freeze drying at home is a game-changer for food preservation, offering convenience, nutrition, and sustainability. By investing in the right equipment and following these steps, you'll enjoy fresh-tasting meals for years to come. Start small, experiment with different foods, and watch your pantry transform into a long-term food storage powerhouse!
Ready to get started? Check out our top-rated freeze-dryers [here](link to recommended products) and join the home freeze-drying community today!